Tag Archives: Sewing

Machine Sewing Your Quilt Binding

21 Nov

I have been looking for an easier way to put my quilt binding on.  I have arthritis in my hands, trying to hold a needle and push it through the fabric can be very painful.  I watched this video and tried it, it came out really nice, now I am sold on this method.  It may not always be the ideal way to do it, especially if you are entering a quilt contest, or it is going to someone really special.  I highly recommend trying it.  It is a personal preference.

May Every Stitch Be A Happy Stitch!

Making An Inexpensive Sewing Table

15 Nov

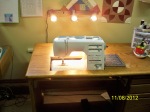
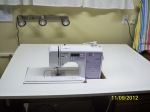
I have needed a better setup for my sewing machine for a long time.  A couple of years ago I picked up this little oak desk for $10.00.  My husband cut a hole in the top to fit my sewing machine at the time.  It worked quite well for a long time, until I decided I wanted to learn how to quilt my own quilts, and found it to be way to small. I would have to move my converted desk out to the middle of the room and surround it with tables. That became quite a nuisance.  Last week my wonderful husband  revamped my little desk again, and look what I got.  This so nice, it makes sewing much more enjoyable.

If anyone of you are wanting to go bigger, but can’t afford it either money wise or room wise, this is an excellent alternative.  The total cost to do

Drop leaf up.

this was $60.00.

Revamped desk with leaf down.

This was fast and easy to do.  I think it took a total of 4 hours to do this.  We bought a 4′ x 8′  sheet of melamine board, had the hardware store cut it for us.  My husband cut out the hole for the sewing machine.  Screwed the top on to the top.  We put piano hinges on for the drop leaf.  Then he ironed on the melamine facing to cover all of the raw edges.  The nice part is if we ever move, he just has to unscrew everything so we can get it out of the house.

Thanks for looking, and may every stitch be a happy stitch!


Maintaining Your Sewing Machine

7 Nov

I just got my sewing machine back from being serviced.  It got me to wondering how many new quilters realize how important it is to do this.

The rule of thumb I have always gone by  is to clean and change the needle with every new project.  I have read where some quilters will stop and clean their machine every fourth bobbin.  I think it depends on your machine.

It is a pain to have to take the throat off of my machine and clean it, but it is well worth the time to do it.  It is amazing how much lint accumulates in the bobbin area.  I keep a can of air by my sewing machine and blow it out when I change bobbins.   When I start  a new project, I take the throat plate off, brush out the lint, insert a new needle, and clean the outside of my machine.  Unfortunately, my machine has to be oiled by the professionals.  If you have a machine you can oil yourself, you need to do this a couple of times a year if you are putting a lot of mileage on it.   If you have the users manual for your machine it will give you detailed information on how to maintain your machine.

Take good care of your machine and you will have many years to enjoy sewing your projects.

May Every Stitch Be A Happy Stitch!


Why and How to Sew With A Scant 1/4″ Seam

31 Oct

watch?v=DSCBzwJ1lB4&feature=related

I have had many conversations with quilters over this last year regarding the 1/4″ seam.  What is a true 1/4″ seam.  I believe this video explains it the best.  She also shows how to gauge it on different sewing machines and she has had a lot of positive feedback on her video.  I think this is well worth your time to view.  The audio is a little gravely, but you can understand what she is saying.

I hope this is helpful to all of you that have wondered about this 1/4″ seam.

May Every Stitch Be a Happy Stitch!

Helpful Tools That Don’t Cost an Arm and a Leg

25 Oct

I have spent the last two days cutting out a quilt.  This quilt has a lot of curves.  I wanted to rotary cut it, but found ou t,  I was trimming my pattern every time I made the corner.  That is not a good thing to have  happen.  I dug out my mat that rotates, but it was so stiff, I couldn’t get as nice of a cut as I needed.  I started going through all of my tools that I have accumulated, nothing that I had bought for quilting was working.  Then I remembered a block my husband made me for tracing  the Dear Jane quilt pieces. One side has sandpaper, the other side has a cutting mat. Instead of trying to cut the pieces with the template in place, I placed my strips of fabric on the sandpaper block, traced around my template, ( after I made a new one), it cut my time in half.  Then I dug out my old lazy susan.  By placing my block on it, with the mat side up, I was able to cut out my pieces quickly and accurately.

The other item I was having trouble with was the quilters tracing pencil.  After much frustration with it, I threw it in the garbage and grabbed my white colored pencil.  It worked perfect.

It just goes to show you, sometimes tools of the trade are not as good as improvising.

Happy Quilting!

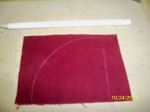
This is on the sandpaper side of my block

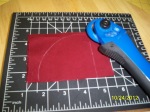
Flipped over to the cutting side.

Sitting on the Lazy Susan Turn Table. It turns freely, making cutting smooth.

Make 4 Flying Geese Units at one time

21 Oct

This method is by far my most favorite way to make the Flying Geese Unit.  Some quilters like using the Quilt In A Day method, but for those do not have the rulers, this is perfect.

Happy Quilting

Flying Geese Made Easy

21 Oct

This is a really good video for making traditional Flying Geese.

Flying Geese are used in so many quilts, and is probably the hardest block to make for accuracy.  This simplifies the process.

Happy Quilting

My Goof

16 Oct

This weekend I had time to catch my breath.  My husband was watching football, which I have no interest in, so I decided to cut out a quilt.  I turned on my favorite radio station, poured me a glass of wine, and withdrew to my sewing room.

The pattern was a winter theme, the fabric I was using had baby woodland animals, cabins, snowmen, etc.

I pulled out the pattern, read it over, got out my fabric, made a few mental notes on what I wanted to do and needed to do to achieve my goal with this pattern, then I went to work cutting out my quilt. The pieces that could not be easily rotary cut, I painstakingly traced  the pattern pieces onto template plastic, and then cut them out.   My quilt consisted of one block,  and I needed 16 blocks. The block consisted of 6 pieces, and there was a lot of fussy cutting that had to be done and two  parts of the block had curved set in pieces.  There was quite a bit of cutting to do.

By the time my husbands football game was over, I had finished cutting out my quilt.  It was time to start dinner, so I put my quilt aside and decided I wouldn’t start sewing until the next day.

Yesterday, I finally had time to start sewing on my quilt.  I got all of the curved pieces sewn to the top of each piece, as the pattern showed.  Now I was ready to start assembling the block. I organized all of my pieces and started sewing the pieces to make my block. I started putting my block together.  That is when I discovered my big blunder.  I cut half of the blocks wrong.  Because of the print, I neglected to make sure my pieces were going the right way when I sewed everything together.  If I put the block together the way I cut it, my animals, trees and cabins would be upside down in every other block.

I was so perturbed with myself for not catching that error before I cut everything out.  It just goes to show you, even seasoned quilters can make big blunders.

All is not lost yet on this quilt.  I will  have to formulate plan B and figure out another way to use the fabric.

New quilters don’t be disheartened when you goof up something, it happens to all of us.  The key is to not let it derail you.  Find a plan B and go from there.

Happy Quilting

Encouragement

7 Oct

Today I was reminiscing in my mind how far I have come with quilting.  When I was in junior high school, my home-economics teacher told me I would never be good at sewing.  The reason being I could not follow simple directions.  The very first project we had in sewing was to make a skirt, with exactly one inch pleats.(Not simple instructions)  I ripped that sucker out so many times, the fabric was see through.  I finally threw it in the garbage, and got a F in the class,my mother did go  to bat for me, got the grade changed to a D, so I did not have to take her class again.  But this teacher made me not want to ever touch a sewing machine again.

When I was in my early 30’s I got interested in doing crafts, and  baby blankets.  I found a 1949 Kenmore sewing machine in an old barn on some property my parents bought.  I took it to Sears, asked them if it was fixable.  They cleaned it up, serviced it. It cost me $25., I took it home and started messing around with it.  I loved that sewing machine.  It had the best stitches on it.  It  was a perfect machine for me to get my feet wet  to try sewing again.   I found I was pretty good at sewing things that were flat.  No inset seams, no pleats, and no teacher barking at me.

I went to work full-time, and between working, raising kids, and taking care of property, I lost interest again in sewing.  Mostly for the lack of time. I finally got rid of the sewing machine.  It was just collecting dust.

Seven years ago we retired.  I found myself with too much time on my hands.  I was telling my neighbor I was tempted to buy a sewing machine and learn how to quilt.  She informed me she had taught quilting for 20 some years, and would be honored to teach me.  Guess what, I bought a sewing machine, she taught me how to quilt, and I have not looked back.  (This teacher was nice)

Anyone who has ever had people in their lives that have made them feel like a failure,  you are not the failure,  I have come to the realization, those people are the bigger failure.    Don’t let anyone tell you,  you are not good at something.  If it is something you want to do, find people who will help you, encourage you, and help you laugh at yourself when you screw up.  I am so glad I did, I have found a passion, that has turned into an addiction, and I have actually had the privilege to teach my granddaughter, my best friend, and now another friend wants me to teach her how to quilt.

If  there is something you really want to try, don’t derail yourself, and above all don’t let others derail you.  Your biggest regret will be not trying.

Have a wonderful day!

Dealing with your Stash

7 Oct

The longer you quilt, the bigger your stash gets.  It can be overwhelming to deal with.    The other day I pulled out some quilt patterns that I have been wanting to make.  I went through my stash, pulled out colors that I thought would look good in the pattern.  I got some big ziplock bags and started building kits with them.  I put a note in each one of what I needed to add to make it complete.  A couple of the patterns would make great table toppers or wall hangings, and I had enough in my stash to accomplish that.  I now have kits ready to sew.  The biggest thrill of doing this, my granddaughter came over.  She is a new quilter, does not have much money to buy fabric.  I let her go through what I had put together.  She got to shop  and left happy as a clam, and I was very excited to see her be able to get something for free.


The Brave Cook

My life from the heart of Berlin!

A Daisy Garden

Photography. Sewing. Cooking. Quilting. Inspiration.

Sandy Chandler & Just Curves' Blog

Home of the Curve Master Presser Foot

Little Wooden Shoe

Hi I´m Alex. I love fabric and Little Wooden Shoe is my label for handmade toys and quilts. I love to share things i'm up to and what inspires me.Please feel free to contact me regarding orders or any questions. alex@littlewoodenshoe.com ©All designs are hand drawn and copyright protected to Little Wooden Shoe

Bucket List Publications

Indulge- Travel, Adventure, & New Experiences

ExploreDreamDiscover Talks

Travel, culture, food, and perception

My Message Ministries

Be Happy, Be Bright, Be You

Morning Story and Dilbert

Inspiring, Encouraging, Healthy / Why waste the best stories of the World, pour a cup of your favorite beverage and let your worries drift away…

jaydogblog

my life in the land down under